Tuesday, February 3, 2015

The Experiment 1/29/15

After I successfully made the prints I was finally, one day before my ISP presentation, ready to start the experimentation with the various household chemicals. I started off with 10 prints but soon realized that that was no going to be enough due to two factors: 1. By using the bleach and the Drano is was very easy to obliterate the entire image in mere seconds so you had to make room for error. 2. Once you started seeing results you wanted to keep experimenting with different combinations of chemicals.

The following were my results. Enjoy!

Clorox and water 1:1 ratio - 10 seconds

Clorox and water 1:1 ratio 8 seconds

Povidone-Iodine solution 2 min 15 seconds

Clorox and water 1:1 ratio - 5 seconds


Pepto Bismol and bleach solution 5 minutes

Listerine

Coca-Cola, Povidone-Iodine, and Pepto Bismol
Drano

Bleach, NyQuil, Povidone Iodine, and Pepto Bismol

Bleach and NyQuil

Bleach and Dawn dish soap

Bengay and Povidone Iodine

Drano and water 1:1 ratio

Drano and water 1:1 ratio left on for a shorter period of time than the one shown above. 

Every chemical mentioned so far

Listerine and Bengay
Needless to say I had quit e a bit of fun with my ISP. Once I started getting results I had to rush back to the darkroom to print 10 more copies so that I could keep experimenting. Once I finished I came to the following conclusions:


  • Texture and potency of the chemical has profound effects on the photos.
  • Bleach and Drano acted as the ferricyanide bromide solution used ins traditional toning (though it was much more destructive). It acted at the catalyst for the reactions that took place.
    • If the goal was to have a slower reaction the following actions were found to be very helpful.
      • Pouring over the image so as to limit the contact that the photo had with the solution.
      • Quickly dipping the image into a tray of bleach solution. 
      • Creat a 1:1 chemial to water solution. 
  • Brilliantly colored solutions i.e. povidone-iodine, Pepto Bismol, and DayQuil acted as the primary toners.
  • Dawn dish soap and Pepto Bismol halted all destruction of the picture that the bleach an the Drano caused. 
  • Bengay caused the most controlled alteration of the image quality. In addition, it also was the only chemical that changed the composition of the image without making the entire image bleed or run. 
Despite the headaches from mixing possibly very dangerous chemicals and all of the smaller trials in the darkroom I learned so much and wouldn't hesitate to do it again or even make a tutorial for school credit about this ISP. I really enjoyed the unpredictable, yet very cool results that the chemicals gave me and believe that I achieve an ISP where science and art were combined. 

I will be posting some final notes about the ISP along with the final paper that I am writing about my month. Until next time snap some photos and keep film alive!


    Wednesday, January 28, 2015

    Testers 1/27/15

    I think that I can confidently say that I am improving in my darkroom skills. I have finally reached a point where I can confidently make my prints and have a satisfying result. I obtained all of the solutions that I am going to use on the photos and the next step was to make the test prints. It was crucial that I not pick any picture for my tests. I wanted to have a photo that contained both very dark and very light regions along with having in focus and out of focus areas so that I could make a thorough evaluation.


    The option, while containing a lot of the elements that I wanted wasn't quite the picture quality that I wanted. 

    The chairs by the Bay had some light portions but not enough to make me happy. 

    This was the only picture that I considered that had people in it, but it was way to pale.

    This picture of the slash pine ended up winning the competition. The center areas of the image were very in focus while the edges were slightly fuzzy. There was a nice balance of light and dark as well. 
    After deciding which image was the best candidate for running my tests on I made a bunch of copies in the darkroom. And just like that I had 10 new copies of the slash pine.


    All of the pictures were developed f/8 on 1.5 seconds. The next step would be to pour the chemicals and my ISP would finally be on its way!

    Monday, January 26, 2015

    Chemicals 1/26/15

    After finally getting the results that I need from the darkroom I got to Target and purchased the "chemicals" that I wanted to use:
    • Bengay Ultra Strength
    • Povidone-Iodine solution
    • Coca-Cola
    • Pepto Bismol (original cherry)
    • Dawn Ultra Original Scent Dishwashing Liquid
    • Clorox Regular Concentrated Bleach
    • Listerine Antiseptic Mouthwash
    • Febreze Air Effects Air Freshener (Mediterranean Lavender Scent)
    • Vicks NyQuil 
    I have been thinking a lot about what my results might be with these chemicals and had a moment of panic when I realized that the inspiration for my ISP was slightly different from the process that I have been using. The artist, Matthew Cetta, who did the original photos was using color photography and I am using black and white. When Cetta poured chemicals on his photos the colors bled and changed. The difference between my process and his is the difference in color photo paper and black and white photo paper. 

    For my first attempt I am going to try and apply the chemicals to the images during the toning process which comes after the fixing process. I am hypothesizing that the image will change and morph in composition as opposed to coloration, but until I perform the actual experiment it's still a mystery!

    Friday, January 23, 2015

    Success 1/22/15

    It finally worked and the results are finally consistent. It turns out that it may have been me exposing the photo paper to light! Here's my new theory: when I would choose a photo I would put everything into focus and bring the photo paper over to the enlarger and then place it face down on make sure that the alignment was right and then when I had figured everything out I would turn the light off, flip the paper, and then turn on the light for the real exposure.

    Today my friend Zach was watching me try and make a print and the first one was black of course because I flipped the paper, but afterwards he asked if that was maybe causing the issue. At this point I was set on it being someone else's fault that the paper had already been exposed but sure enough, when I stopped trying to align everything perfectly all of a sudden everything fell into place and I got some of my best work! All of the photographs were developed using f/8 on 2.5 seconds.

    Allie

    Zoe and Dorthy

    All of my works to date.

     Needless to say I will be sleeping easy tonight knowing that my budget is finished and that I finally have some kind of consistency in my work. I was pretty successful with the image quality and only have a few water spots and streaks that are invisible on a computer but that are very visible in person. I know I said earlier that I was not searching for perfection in my pictures but it's a really nice feeling when you pull the print out of the last chemical bath and get to see how crisp and clear the image is. I cannot wait for future developments!

    Thursday, January 22, 2015

    The Print pt.2 1/21/15

    The second portion of the night was't nearly as nice and easy sailing. The very first attempt using the 11 trick I realized that I had accidentally and very carelessly forgotten to chance the f-stop from 2 to 11 so the image was way too exposed and I basically got a completely back sheet of photo paper. Not the most exciting way to start not to mention the small amount of guilt that you could have saved a piece of paper. Instead of of wasting too many more sheets I decided to start using test strips to start honing in on a crisp photo.

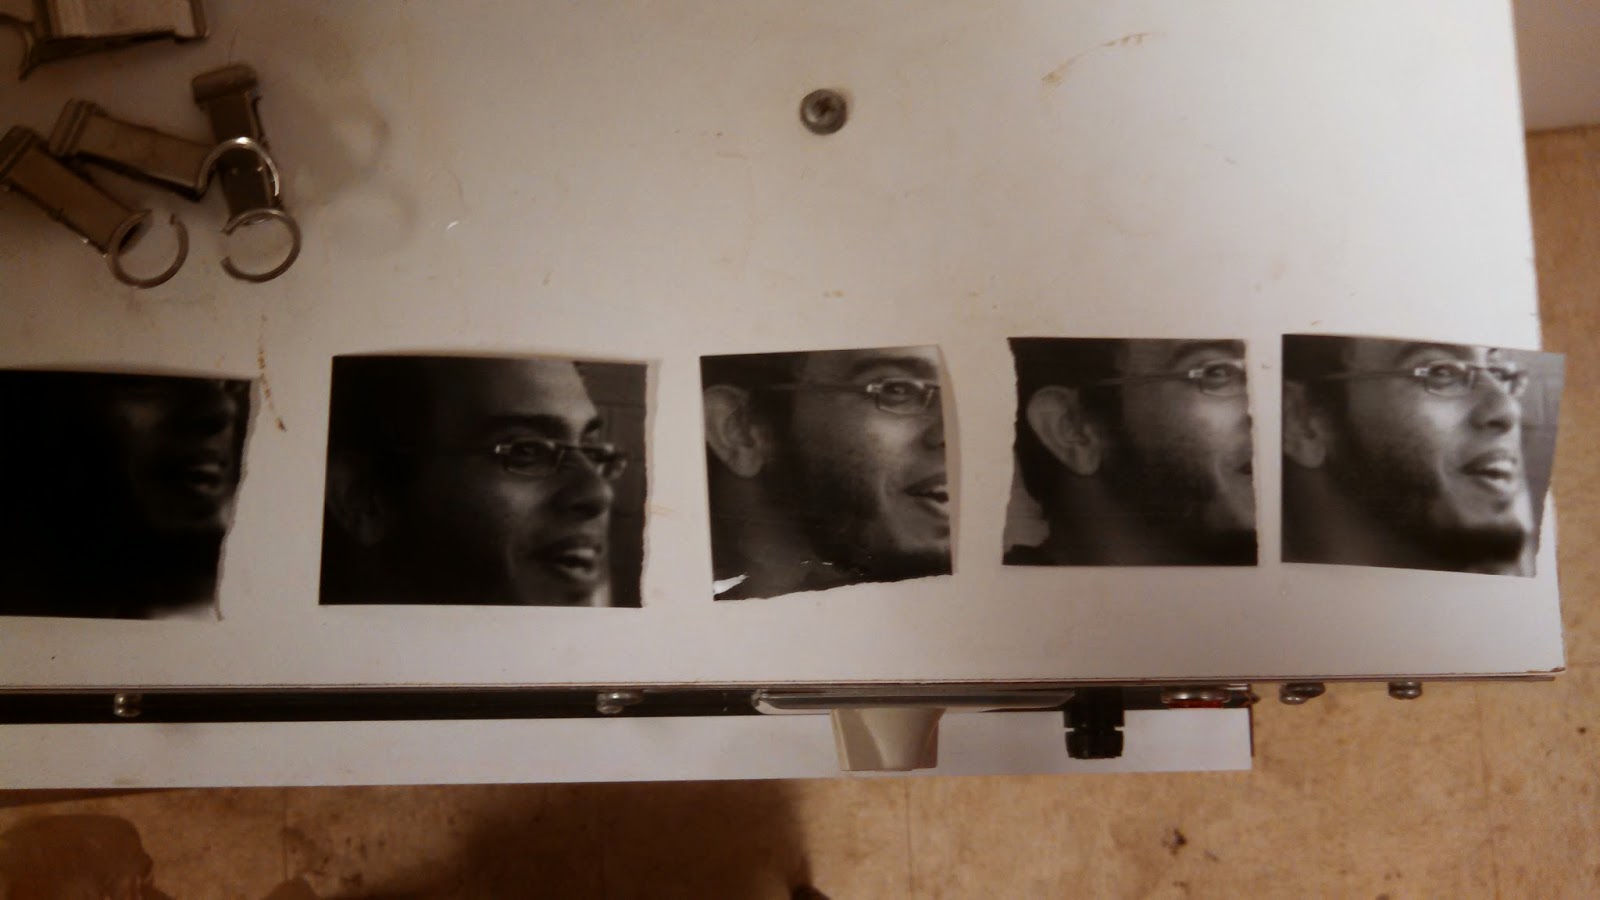
    5 test strips of a photo

    The first two were taken with  f/2 and the times of 0.5 and 0.3 seconds, respectively. 

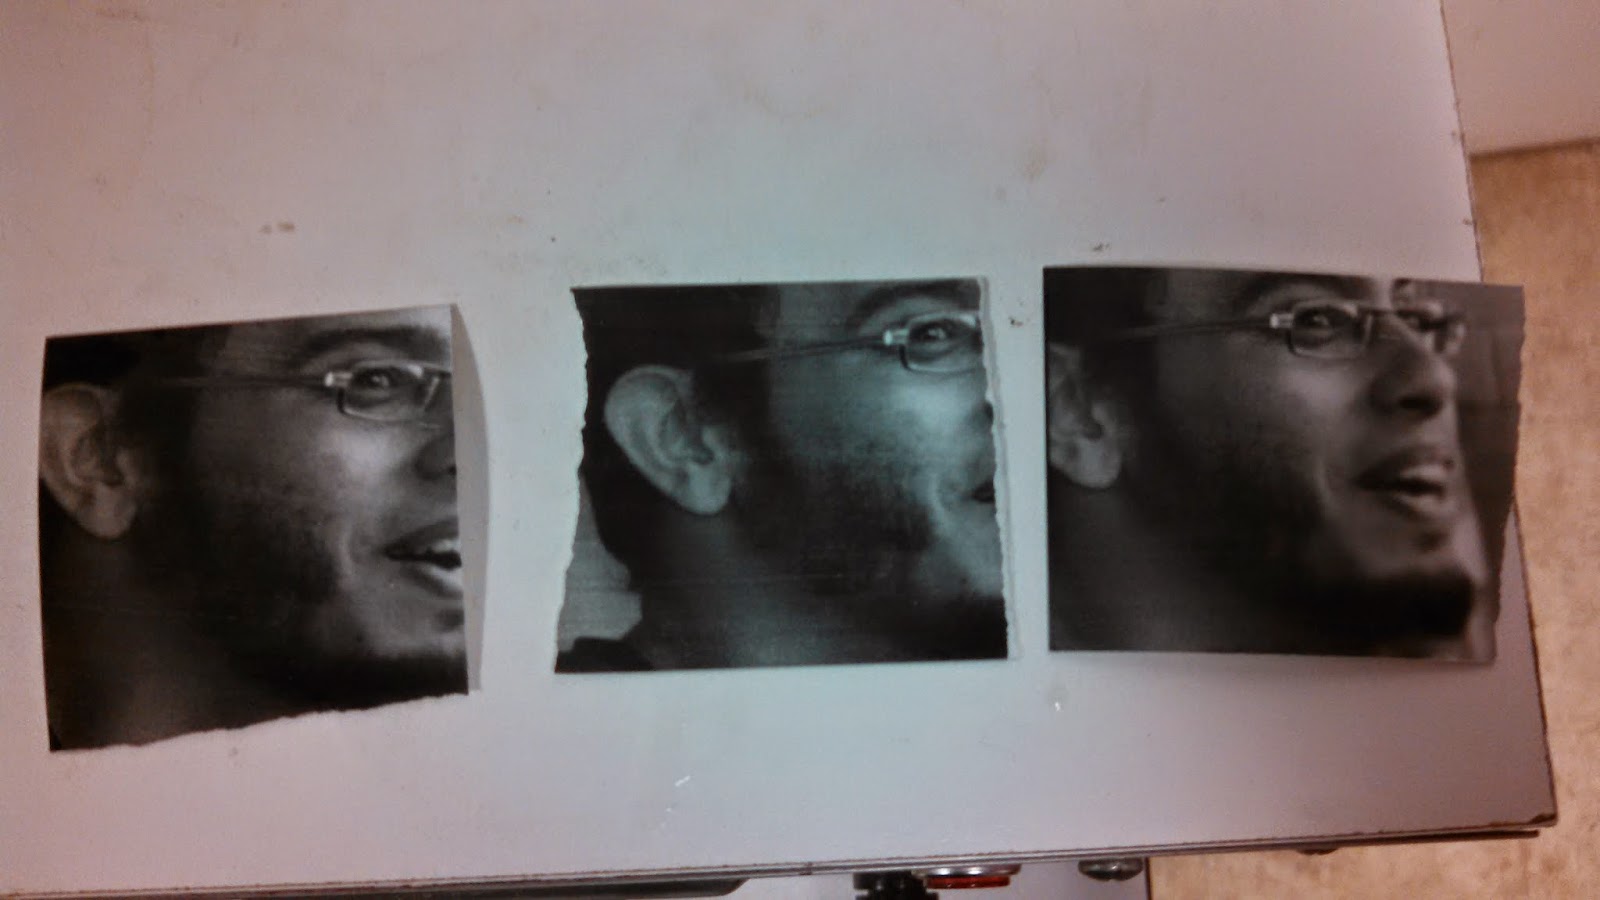
    I realized that I didn't want to have my f-stop letting so much light onto my negative so I changed back to f/11 with 10, 10.5, and 11 seconds respectively. 
    I finally decided on the 10.5 second option since it gave a clear image with nice shadows. The very first time that I tried to make the 8x10 print I was horrified when the entire sheet came out completely black. I rushed back to check the settings and everything was in order. I tried again after triple checking everything and once again all black. Mind you developing photos is NOT a quick and easy process. You have to make sure everything is in focus and then you have to follow through the processes of all the chemical baths so that you can look at it out in the light. And just like that 10 minutes have gone by! Finally, for no rhyme or reason, the third piece of paper turned out beautifully.
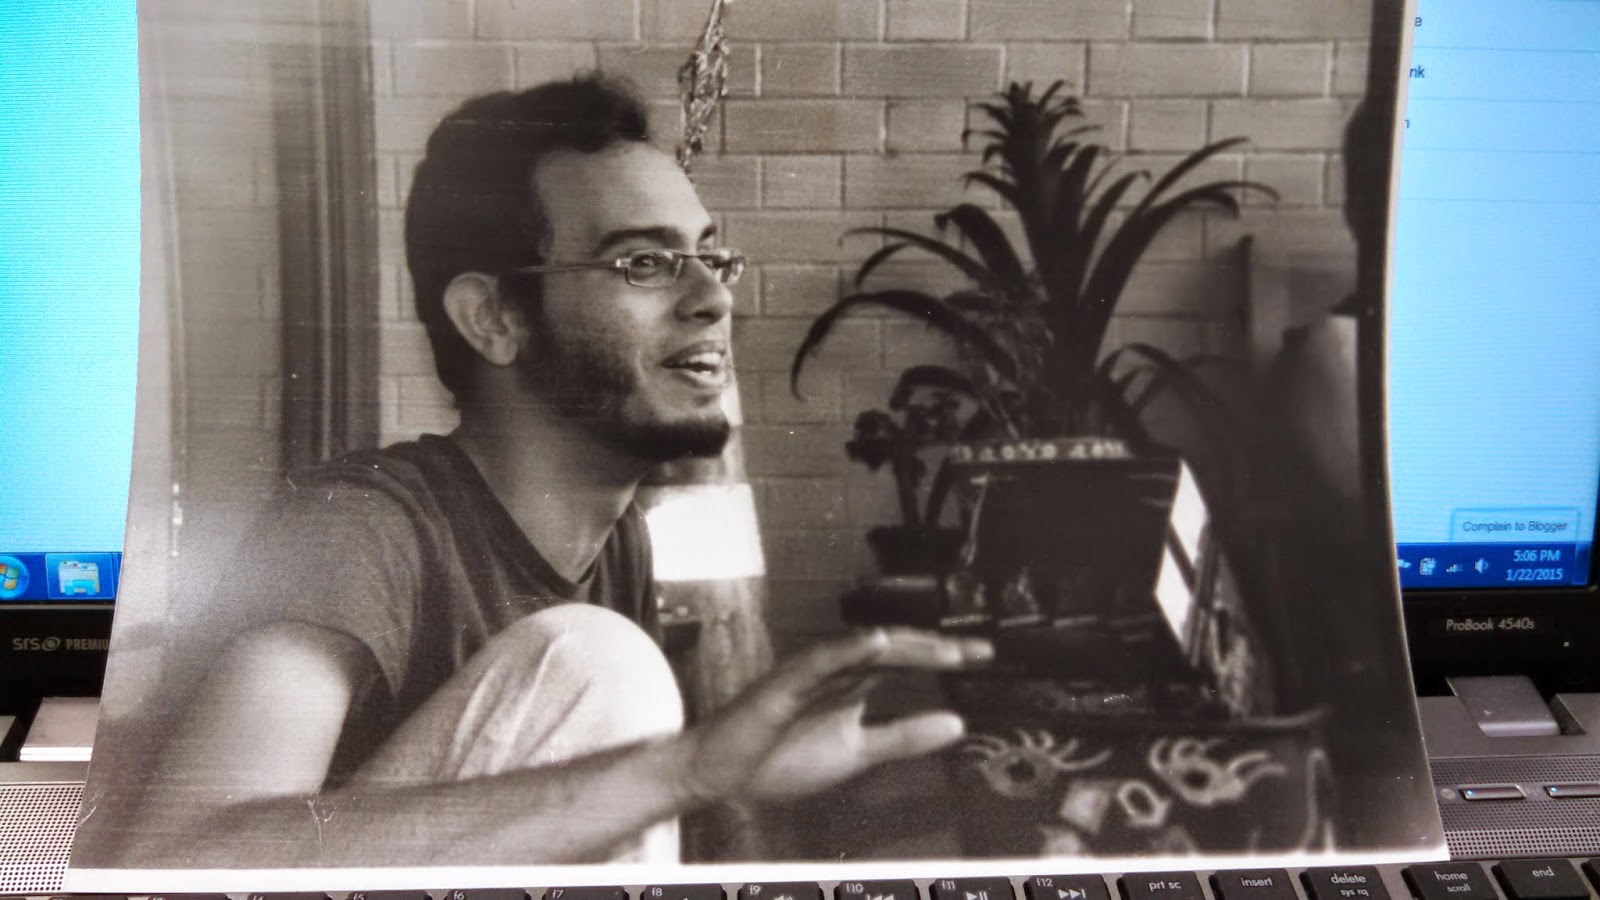
    Nick Padilla 
    When the image appeared I knew that it was the one. Despite the slight about on streaking on the left hand side of the photo, the slight smile on Nick's lips, the balcony just clear enough to capture the moment, and the tacky Christmas star sticking out of the traffic cone all are so organic and brings a smile to everyone's lips.

    After my final success I hurried on to the next picture, one of Zoe getting licked by a dog down by the bay. I got everything adjusted with all my triple checks and with a deep breath pretty the button. I rushed the sheet over to the developing tub and hopefully slid it in making sure that the solution touched the paper evenly. The result.... a black sheet of paper.... again. 

    After lots of frustration and usage of more test strips that were successful I have come to several conclusions.

    1. I can confidently mix developer now.

    2. There must have been a certain amount of paper that had been exposed to light. I had two different packs of paper that appeared to have been hidden from the light but there must have been some sheets that got randomly exposed to the light because nothing else explains why I was getting such inconsistent results. 

    3. Patience is a virtue when it comes to developing pictures. When I first started working on the contact sheets everything seemed so easy because I was developing on a 1:1 ration which meant that I wasn't dealing with the factor of enlarging. Being paid for this totally makes sense now. While a bathroom darkroom is fun for a couple of pictures, doing this in large quantities is a pain in the butt!

    My next step is to return to the darkroom and start playing what I have nicknamed Russian roulette: the photo paper edition. I absolutely have to be able to have more consistent results if I am going to be dealing with altering more factors of the developing process. 

    The Print pt.1 1/21/5

    Today I made my very first prints in the darkroom. It's a very crazy science to say that least. Messing with the times and testing whether it is too much or too light light exposure is one of the most tedious but time consuming things for me. For Andrew, he always used the 11,11,11 trick but for some of my pictures the lighting was not right and the images come out way too dark. But before I get ahead of myself let me tell you how I started out. The very first thing that you do is make a contact sheet which is a print of the negatives using a one to 1:1 printing method. By that, I mean the size of the pictures on the negatives is the same on the print. The purpose of making this print is to help you evaluate which photos are good to make prints of and which aren't.

    But before I could make the sheet I made sure that the developer solution was working properly. When I walked into the dark room I looked at the trays and realized that the entire tub of developer was a dark purple-y, black color. I guessed that the chemicals had been exhausted but wanted to double check with a test strip that I exposed to florescent light. Sure enough, when I dipped the paper in, it remained white, a clear sign that the solution was no longer usable. So I went into the cabinet and mixed a new solution with a 1:9 ration of chemical:water. I was worried that it wouldn't work but luckily for me I did it right!

    Having to hold these up to the night and squint and imagine what the printed version might look like is always a pain. 

    So you make this...

    And this...
    By looking at these contact sheets I knew which photos were worth printing and which ones I shouldn't even bother with. To make these prints I set height of the enlarger to 11 inches, f11, and the light timer to 11 seconds and with a small amount of twiddling I got these.

    F-number, also known as the f-stop, is the size of the hole that lets light onto the negative. The common numbers are: f/1.4,  f/2,  f/2.8,  f/4,  f/5.6,  f/8,  f/11,  f/16, and f/22. I believe that the enlarger that I am using, the Bessler 23CII has a range of 2-16. The larger the number the smaller the opening. From this, you know that the smaller the opening the longer amount of time you need to have the light shining on the negative to make a crisp print.

    The next step was to make the prints.

    Sunday, January 18, 2015

    The Process in Pictures 1/18/15

    I realized that after I wrote the huge post about the process that I have been using in the darkroom to develop the film, that it was way to wordy. Sometimes you have to see the process right before your eyes to really understand what's happening. So here you are:


    In the safety of darkness you open the canister. 

    Roll the film onto the reel.
    Place it in the light safe container. Note: even though the canister is light safe it allows liquids to pass through it. 

    Measure the room temperature using room temperature water. We have a chart that says that when using stock developer at 68 degrees you keep is on the film for 7-8 minutes. If the room temperature is cooler than 68 then you have to leave the chemicals on the film longer and if it's warmer you leave it in for less time.  
    We used Kodak D-76 Developer and the light safe containers that we have are 8 oz, thus we measure out the volume of the containers. The room was 64 degrees today meaning that we keep the chemicals on the film for 9 min and 15 seconds. Agitating the solution for 5 seconds every 30 seconds until the time is up. Then you empty it into the sink.
    Add 8 oz of stop bath and agitate constantly for 30 seconds. Once the time is up empty and fill with water and swish enough for a quick but thorough rinse.
    Fill container with 8 oz of fixer. Leave in for 5 minutes agitating for 5 seconds every 30 seconds. Empty when the time is up into a specially marked bin labeled "used fixer" and rinse again with room temperature water. 
    Next fill with 8 oz of permawash. This solution helps reduce the water bath time to 10 minutes from the original 20 minutes. Leave the permawash in for 5 minutes and repeat the same agitating process as before. 
    After the permawash you must put the film into the water bath in the back tube above. The tube keeps fresh water constantly moving evenly throughout the container. The bath lasts 10 minutes. 
    Place the film into the dryer on medium for 30 minutes minimum. 
    And just like that you have your developed rolls of film!

    First Day of Developing 1/18/15

    Today was the big day! I developed my first two rolls of film all by myself! When I got into the darkroom I suddenly was hyper aware of all of the things that could go wrong: not roll the film on properly so that the images are ruined, not keep the chemicals in long enough, leave the chemicals in too much, and so on, and so forth. My very first run wasn't the cleanest. I slipped up and made some very dumb and obvious mistakes. We'll start with the fact that when I poured the developer into the light safe canister and started agitating the solution all of a sudden large drips of developer started going all over the counter. The problem you ask? I forgot to put the cap on the canister. Silly stuff like that.

    Leaving the cap off was a stupid mistake but there were other issues that I encountered. When I first learned the process Andrew was standing right next to me and confirming that I was doing everything right and if I started doing the wrong thing he would stop me. In this new environment I was all on my own. Standing alone in the dark I was all of a sudden freaking out about whether I had rolled the film on straight or whether the little holes along the edge of the film had securely latched on to the prongs on the film spool. I must have rolled and unrolled the film 5 or 6 times before I finally threw my hands up and said that it was my best try and I had to move on in the process.

    I practiced over and over before I went back into the pitch blackness. Even after all of the practice, rolling by feel is very difficult. 
    Thankfully I was able to get my very first roll of film developed through all of my second guessing. However, we shall see the the true quality of the pictures when I get the negatives under the enlarger.

    Unrolling the film and seeing Zoe's face was beyond relieving after the first debacle.  

    Some more results from the first roll that I developed. 
     After the first run the second one seemed unbelievable easy. Once I got into the rhythm of the process I was able to relax and at one point sing really loudly to all of the best Jackson 5 songs. The darkroom is a place of peace and solitude and I foresee spending many more nights there. To say the least, my time in the darkroom was successful and there will be updates on the prints soon!