Wednesday, January 28, 2015

Testers 1/27/15

I think that I can confidently say that I am improving in my darkroom skills. I have finally reached a point where I can confidently make my prints and have a satisfying result. I obtained all of the solutions that I am going to use on the photos and the next step was to make the test prints. It was crucial that I not pick any picture for my tests. I wanted to have a photo that contained both very dark and very light regions along with having in focus and out of focus areas so that I could make a thorough evaluation.


The option, while containing a lot of the elements that I wanted wasn't quite the picture quality that I wanted. 

The chairs by the Bay had some light portions but not enough to make me happy. 

This was the only picture that I considered that had people in it, but it was way to pale.

This picture of the slash pine ended up winning the competition. The center areas of the image were very in focus while the edges were slightly fuzzy. There was a nice balance of light and dark as well. 
After deciding which image was the best candidate for running my tests on I made a bunch of copies in the darkroom. And just like that I had 10 new copies of the slash pine.


All of the pictures were developed f/8 on 1.5 seconds. The next step would be to pour the chemicals and my ISP would finally be on its way!

Monday, January 26, 2015

Chemicals 1/26/15

After finally getting the results that I need from the darkroom I got to Target and purchased the "chemicals" that I wanted to use:
  • Bengay Ultra Strength
  • Povidone-Iodine solution
  • Coca-Cola
  • Pepto Bismol (original cherry)
  • Dawn Ultra Original Scent Dishwashing Liquid
  • Clorox Regular Concentrated Bleach
  • Listerine Antiseptic Mouthwash
  • Febreze Air Effects Air Freshener (Mediterranean Lavender Scent)
  • Vicks NyQuil 
I have been thinking a lot about what my results might be with these chemicals and had a moment of panic when I realized that the inspiration for my ISP was slightly different from the process that I have been using. The artist, Matthew Cetta, who did the original photos was using color photography and I am using black and white. When Cetta poured chemicals on his photos the colors bled and changed. The difference between my process and his is the difference in color photo paper and black and white photo paper. 

For my first attempt I am going to try and apply the chemicals to the images during the toning process which comes after the fixing process. I am hypothesizing that the image will change and morph in composition as opposed to coloration, but until I perform the actual experiment it's still a mystery!

Friday, January 23, 2015

Success 1/22/15

It finally worked and the results are finally consistent. It turns out that it may have been me exposing the photo paper to light! Here's my new theory: when I would choose a photo I would put everything into focus and bring the photo paper over to the enlarger and then place it face down on make sure that the alignment was right and then when I had figured everything out I would turn the light off, flip the paper, and then turn on the light for the real exposure.

Today my friend Zach was watching me try and make a print and the first one was black of course because I flipped the paper, but afterwards he asked if that was maybe causing the issue. At this point I was set on it being someone else's fault that the paper had already been exposed but sure enough, when I stopped trying to align everything perfectly all of a sudden everything fell into place and I got some of my best work! All of the photographs were developed using f/8 on 2.5 seconds.

Allie

Zoe and Dorthy

All of my works to date.

 Needless to say I will be sleeping easy tonight knowing that my budget is finished and that I finally have some kind of consistency in my work. I was pretty successful with the image quality and only have a few water spots and streaks that are invisible on a computer but that are very visible in person. I know I said earlier that I was not searching for perfection in my pictures but it's a really nice feeling when you pull the print out of the last chemical bath and get to see how crisp and clear the image is. I cannot wait for future developments!

Thursday, January 22, 2015

The Print pt.2 1/21/15

The second portion of the night was't nearly as nice and easy sailing. The very first attempt using the 11 trick I realized that I had accidentally and very carelessly forgotten to chance the f-stop from 2 to 11 so the image was way too exposed and I basically got a completely back sheet of photo paper. Not the most exciting way to start not to mention the small amount of guilt that you could have saved a piece of paper. Instead of of wasting too many more sheets I decided to start using test strips to start honing in on a crisp photo.

5 test strips of a photo

The first two were taken with  f/2 and the times of 0.5 and 0.3 seconds, respectively. 

I realized that I didn't want to have my f-stop letting so much light onto my negative so I changed back to f/11 with 10, 10.5, and 11 seconds respectively. 
I finally decided on the 10.5 second option since it gave a clear image with nice shadows. The very first time that I tried to make the 8x10 print I was horrified when the entire sheet came out completely black. I rushed back to check the settings and everything was in order. I tried again after triple checking everything and once again all black. Mind you developing photos is NOT a quick and easy process. You have to make sure everything is in focus and then you have to follow through the processes of all the chemical baths so that you can look at it out in the light. And just like that 10 minutes have gone by! Finally, for no rhyme or reason, the third piece of paper turned out beautifully.

Nick Padilla 
When the image appeared I knew that it was the one. Despite the slight about on streaking on the left hand side of the photo, the slight smile on Nick's lips, the balcony just clear enough to capture the moment, and the tacky Christmas star sticking out of the traffic cone all are so organic and brings a smile to everyone's lips.

After my final success I hurried on to the next picture, one of Zoe getting licked by a dog down by the bay. I got everything adjusted with all my triple checks and with a deep breath pretty the button. I rushed the sheet over to the developing tub and hopefully slid it in making sure that the solution touched the paper evenly. The result.... a black sheet of paper.... again. 

After lots of frustration and usage of more test strips that were successful I have come to several conclusions.

1. I can confidently mix developer now.

2. There must have been a certain amount of paper that had been exposed to light. I had two different packs of paper that appeared to have been hidden from the light but there must have been some sheets that got randomly exposed to the light because nothing else explains why I was getting such inconsistent results. 

3. Patience is a virtue when it comes to developing pictures. When I first started working on the contact sheets everything seemed so easy because I was developing on a 1:1 ration which meant that I wasn't dealing with the factor of enlarging. Being paid for this totally makes sense now. While a bathroom darkroom is fun for a couple of pictures, doing this in large quantities is a pain in the butt!

My next step is to return to the darkroom and start playing what I have nicknamed Russian roulette: the photo paper edition. I absolutely have to be able to have more consistent results if I am going to be dealing with altering more factors of the developing process. 

The Print pt.1 1/21/5

Today I made my very first prints in the darkroom. It's a very crazy science to say that least. Messing with the times and testing whether it is too much or too light light exposure is one of the most tedious but time consuming things for me. For Andrew, he always used the 11,11,11 trick but for some of my pictures the lighting was not right and the images come out way too dark. But before I get ahead of myself let me tell you how I started out. The very first thing that you do is make a contact sheet which is a print of the negatives using a one to 1:1 printing method. By that, I mean the size of the pictures on the negatives is the same on the print. The purpose of making this print is to help you evaluate which photos are good to make prints of and which aren't.

But before I could make the sheet I made sure that the developer solution was working properly. When I walked into the dark room I looked at the trays and realized that the entire tub of developer was a dark purple-y, black color. I guessed that the chemicals had been exhausted but wanted to double check with a test strip that I exposed to florescent light. Sure enough, when I dipped the paper in, it remained white, a clear sign that the solution was no longer usable. So I went into the cabinet and mixed a new solution with a 1:9 ration of chemical:water. I was worried that it wouldn't work but luckily for me I did it right!

Having to hold these up to the night and squint and imagine what the printed version might look like is always a pain. 

So you make this...

And this...
By looking at these contact sheets I knew which photos were worth printing and which ones I shouldn't even bother with. To make these prints I set height of the enlarger to 11 inches, f11, and the light timer to 11 seconds and with a small amount of twiddling I got these.

F-number, also known as the f-stop, is the size of the hole that lets light onto the negative. The common numbers are: f/1.4,  f/2,  f/2.8,  f/4,  f/5.6,  f/8,  f/11,  f/16, and f/22. I believe that the enlarger that I am using, the Bessler 23CII has a range of 2-16. The larger the number the smaller the opening. From this, you know that the smaller the opening the longer amount of time you need to have the light shining on the negative to make a crisp print.

The next step was to make the prints.

Sunday, January 18, 2015

The Process in Pictures 1/18/15

I realized that after I wrote the huge post about the process that I have been using in the darkroom to develop the film, that it was way to wordy. Sometimes you have to see the process right before your eyes to really understand what's happening. So here you are:


In the safety of darkness you open the canister. 

Roll the film onto the reel.
Place it in the light safe container. Note: even though the canister is light safe it allows liquids to pass through it. 

Measure the room temperature using room temperature water. We have a chart that says that when using stock developer at 68 degrees you keep is on the film for 7-8 minutes. If the room temperature is cooler than 68 then you have to leave the chemicals on the film longer and if it's warmer you leave it in for less time.  
We used Kodak D-76 Developer and the light safe containers that we have are 8 oz, thus we measure out the volume of the containers. The room was 64 degrees today meaning that we keep the chemicals on the film for 9 min and 15 seconds. Agitating the solution for 5 seconds every 30 seconds until the time is up. Then you empty it into the sink.
Add 8 oz of stop bath and agitate constantly for 30 seconds. Once the time is up empty and fill with water and swish enough for a quick but thorough rinse.
Fill container with 8 oz of fixer. Leave in for 5 minutes agitating for 5 seconds every 30 seconds. Empty when the time is up into a specially marked bin labeled "used fixer" and rinse again with room temperature water. 
Next fill with 8 oz of permawash. This solution helps reduce the water bath time to 10 minutes from the original 20 minutes. Leave the permawash in for 5 minutes and repeat the same agitating process as before. 
After the permawash you must put the film into the water bath in the back tube above. The tube keeps fresh water constantly moving evenly throughout the container. The bath lasts 10 minutes. 
Place the film into the dryer on medium for 30 minutes minimum. 
And just like that you have your developed rolls of film!

First Day of Developing 1/18/15

Today was the big day! I developed my first two rolls of film all by myself! When I got into the darkroom I suddenly was hyper aware of all of the things that could go wrong: not roll the film on properly so that the images are ruined, not keep the chemicals in long enough, leave the chemicals in too much, and so on, and so forth. My very first run wasn't the cleanest. I slipped up and made some very dumb and obvious mistakes. We'll start with the fact that when I poured the developer into the light safe canister and started agitating the solution all of a sudden large drips of developer started going all over the counter. The problem you ask? I forgot to put the cap on the canister. Silly stuff like that.

Leaving the cap off was a stupid mistake but there were other issues that I encountered. When I first learned the process Andrew was standing right next to me and confirming that I was doing everything right and if I started doing the wrong thing he would stop me. In this new environment I was all on my own. Standing alone in the dark I was all of a sudden freaking out about whether I had rolled the film on straight or whether the little holes along the edge of the film had securely latched on to the prongs on the film spool. I must have rolled and unrolled the film 5 or 6 times before I finally threw my hands up and said that it was my best try and I had to move on in the process.

I practiced over and over before I went back into the pitch blackness. Even after all of the practice, rolling by feel is very difficult. 
Thankfully I was able to get my very first roll of film developed through all of my second guessing. However, we shall see the the true quality of the pictures when I get the negatives under the enlarger.

Unrolling the film and seeing Zoe's face was beyond relieving after the first debacle.  

Some more results from the first roll that I developed. 
 After the first run the second one seemed unbelievable easy. Once I got into the rhythm of the process I was able to relax and at one point sing really loudly to all of the best Jackson 5 songs. The darkroom is a place of peace and solitude and I foresee spending many more nights there. To say the least, my time in the darkroom was successful and there will be updates on the prints soon!

Thursday, January 15, 2015

The Glossary 1/15/15

Over the course of this ISP I have learned a lot of new terms that I had no idea existed before the month of January started but after quick Googling and a repeated reference to Kodak's glossary which you can find here. When I started reading all of the information on film photography I was really overwhelmed by the technical language and then when I started trying to learn the developing side of film it was like learning yet another language. However, as I venture further into the film photography world, I am being more acquainted with the terminology.


Film Appreciation 1/15/15

It's funny how you forget really helpful information sometimes, but it's almost like a test to see whether you can pick yourself up and brush off and keep going. As you may know, my first roll of film was a whole lotta nothing and quite disappointing because of a busted light meter. Apparently I had been told this earlier but had completely forgotten but alas c'est la vie. Andrew was very kind and lent me his camera, a Canon EOS Rebel K2 with a Canon lens 28-80 mm, 0.38m/1.3ft with a B + W 40.5 mm Kaesemann Circular Polarizer Multi Coated Glass Filter. 

The Canon is quite nice and much faster to use than the Minoltas that I was using earlier because of the automatic focusing, automatic shutter, automatic aperture settings, and other simple but very helpful options. For those who dislike doing things by hand  the camera also makes rolling film really easy and eliminates the possibility that you might not wind the film to the right tension. The filter apparently: 


"...helps to reduce reflections and glare by filtering out light that has become polarized due to reflection from a non-metallic surface. The light from the sun naturally becomes partially polarized due to reflecting off electrons in air molecules, causing the light to scatter into what appears as haze. A polarizing filter arranges, and filters, this directionally polarized light perpendicularly to the reflected light, allowing for the absorption of much of this light. This results in a noticeable reduction of glare and reflections from non-metallic surfaces and an increase in the saturation of skies and foliage."


Which Andrew summarized as: its good to use outside and he gives it a good recommendation. I am going to try and take most of my images outside because it tends to be rater pretty and not to mention sunny, in Sarasota. Sadly, the last few days have been grey and drizzly which haven't mixed well with my want for good lighting. Every now and then I catch myself just pointing the camera at different things checking to see if it would look good on film. I am beginning more and more to understand the beauty of how simply film cameras work and have really enjoyed learning the science behind it all. 

A lot of people use film because they love how conscious you become of how many pictures you take and the composition of them. You have to make every single snap matter because you only have about 24 tries and you can't afford to just snap away. Today, we have the luxury to review our hundreds of pictures we took in a day and then dump the ones that weren't quite right within seconds. So many people click and click with the "there's gotta be a good one in there somewhere" mentality but with film you have to really take the time and compose yourself and figure out whether everything would look good. I watched the documentary, "Long Live Film" by the Indie Film Lab about people who enjoy film and for what reasons and it seemed like every single person either said it made them more conscious about the moment they were documenting and that it helped them stay in touch with the here and now or that film captures something indescribable that can't be reproduced using digital methods. One described film photography as "very organic" while another liked the Polaroid's ability to produce instant, physical pictures of the moments in his kid's lives. This of course does not mean that one is exclusively better than the other, but that they each have their own unique pros and cons. I really like all of the reasons, and mostly agree, with the ones expressed in the documentary but for me the moment of realization of why you are using film instead of digital is when you dunk the empty looking piece of paper in the developer and just like that an image beings to appear before you. And all of a sudden I feel like a child again. It's the beauty of art and science being married together right before your eyes that I find beautiful. And just like that, the reason that I am conducting this ISP slips into focus. 

Tuesday, January 13, 2015

Developing the Negatives 1/12/15

Today I got to learn the other half of the development process: the negatives. The night before I had managed to use up an entire roll of film, probably too fast all things considered. That aside I was getting really excited to see some really bad pictures that I could proudly say I had completely developed myself.

The very first thing that you have to do is go into the darkroom proper in complete darkness without the red safety lights on, open the camera, remove the film canister, open the canister, remove the film from inside the canister, and then roll it onto the 35mm reel. Let me tell you it is not easy. The reel is used make sure that the film doesn't touch itself causing smudgy pictures. Andrew made me practice rolling the film onto the real many times before I did it in the pitch darkness and I am so glad that I did!
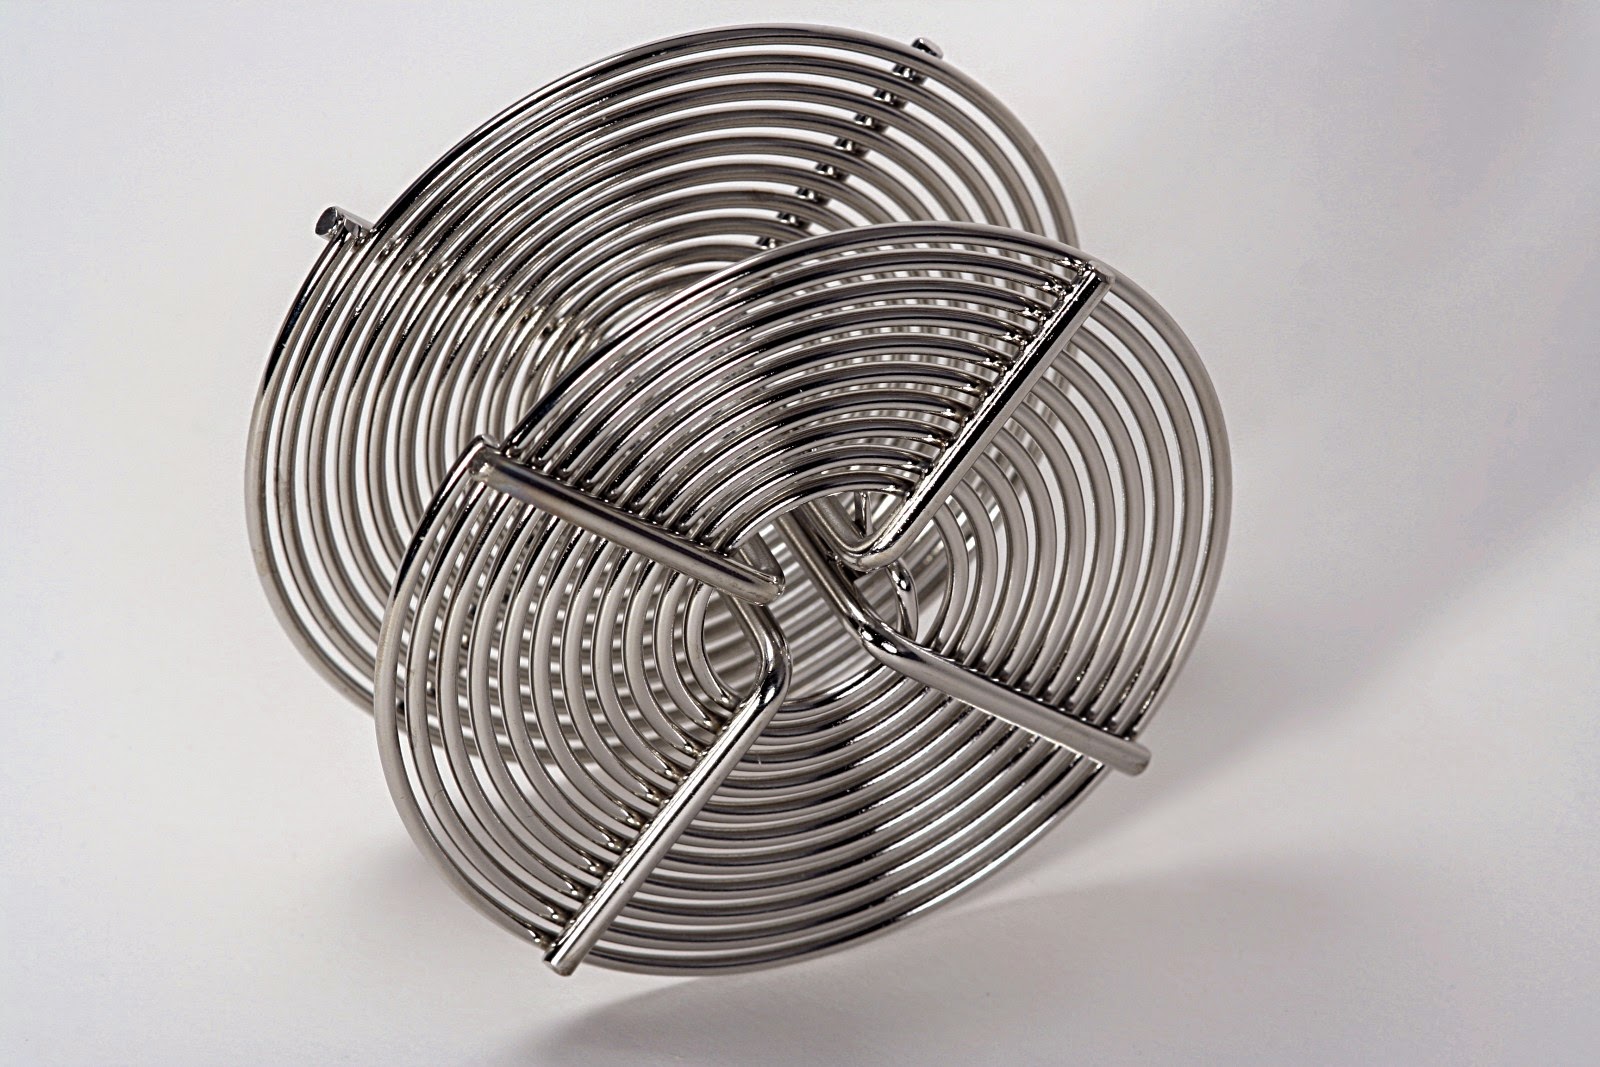
35 mm film reel
The next thing that you do, while still in total darkness, is place the reel with the film on it, in a light-safe canister.

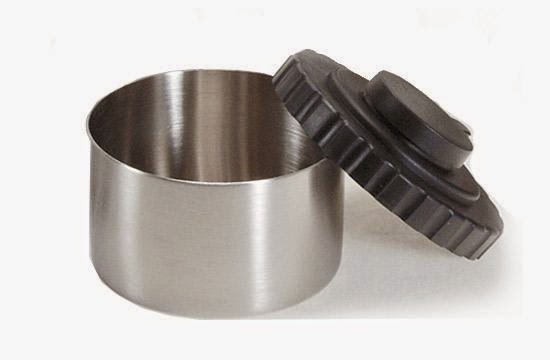
The light safe canister holds the real perfectly. On the top there is hole where you can pour your chemicals in without letting you let in light. The cap obviously keeps you from spilling anything while you are agitating the solutions.
For the next steps you can leave the dark part of the darkroom and do the rest of the developing process in normal light.

Where the magic happens.
The fun door to where the other magic happens!

I used 5 main solutions during my developing process: developer, water, stop bath, fixer, and permawash.

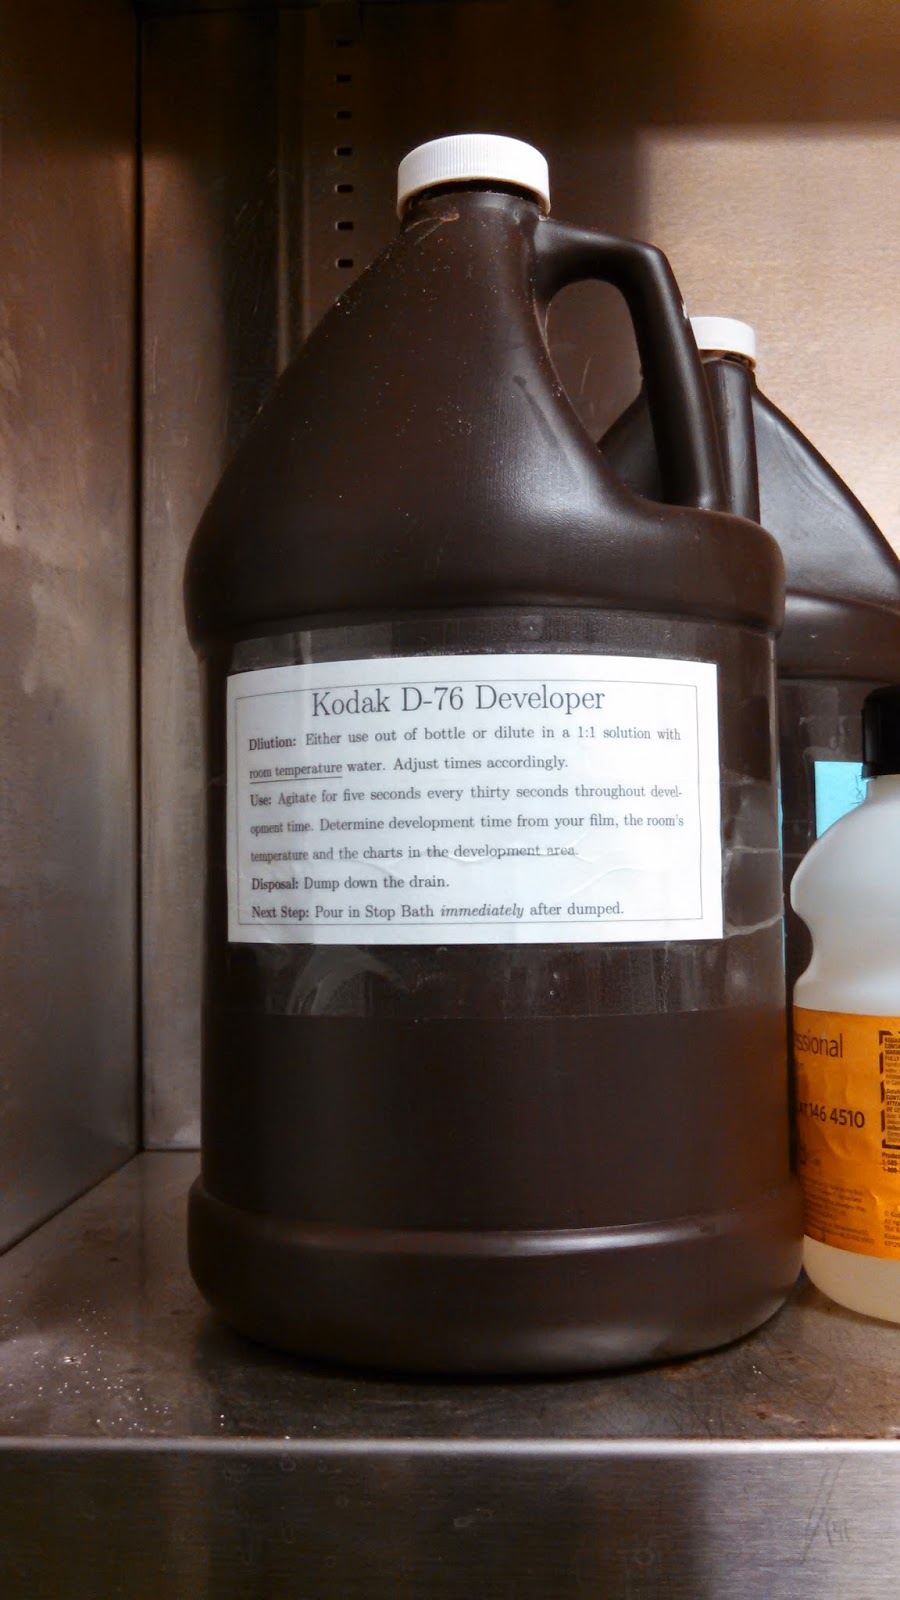
In the New College darkroom we use Kodak D-76 Developer.
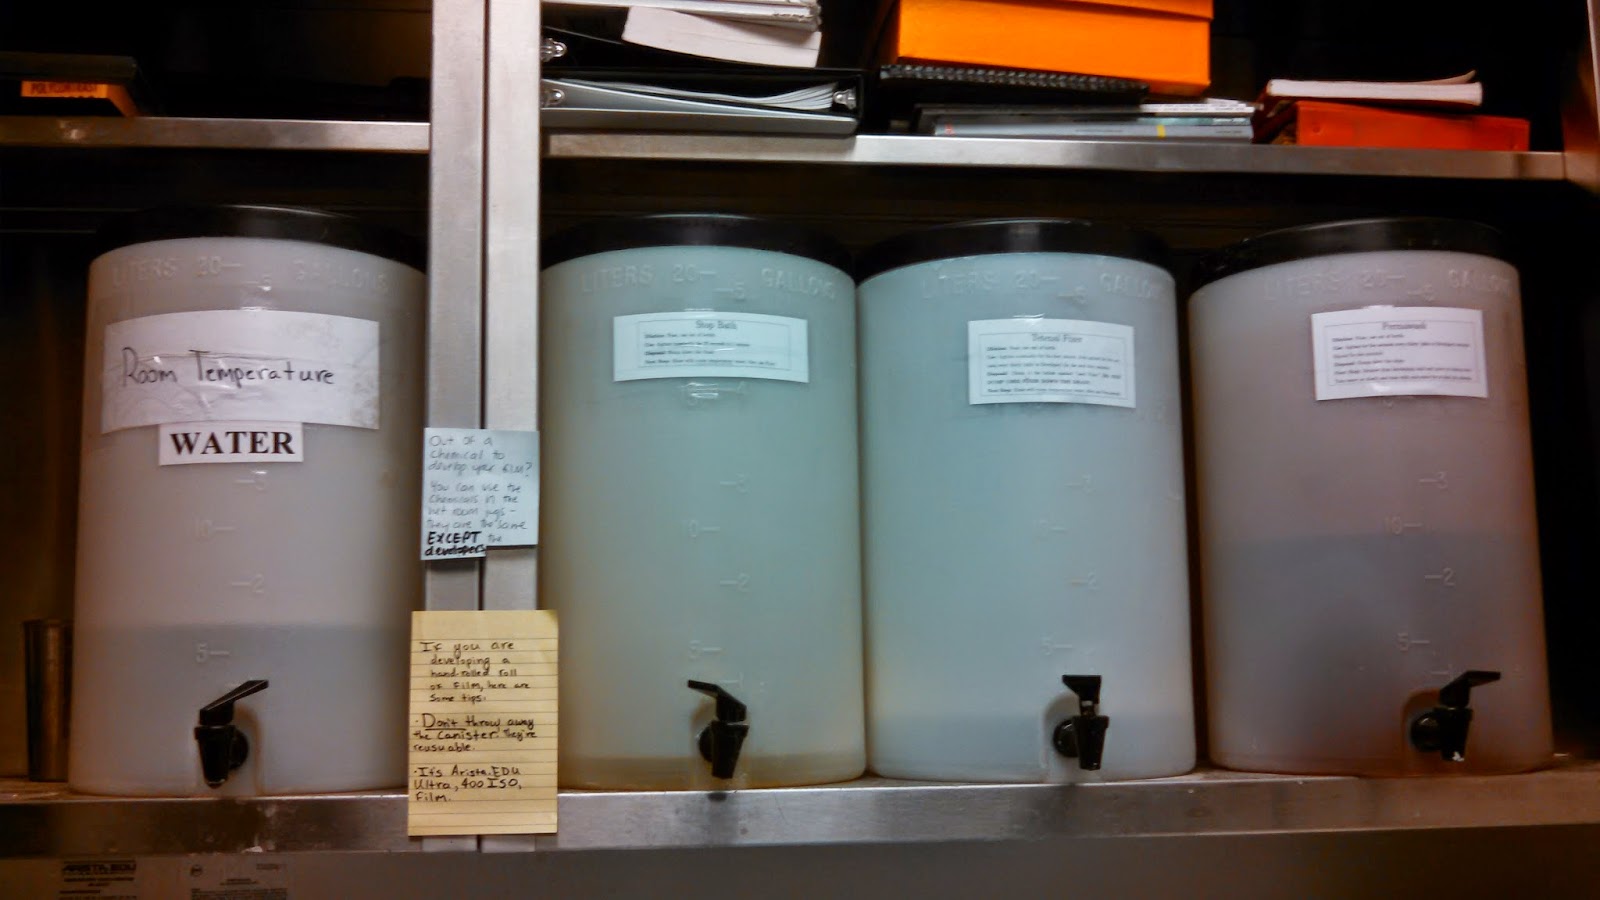
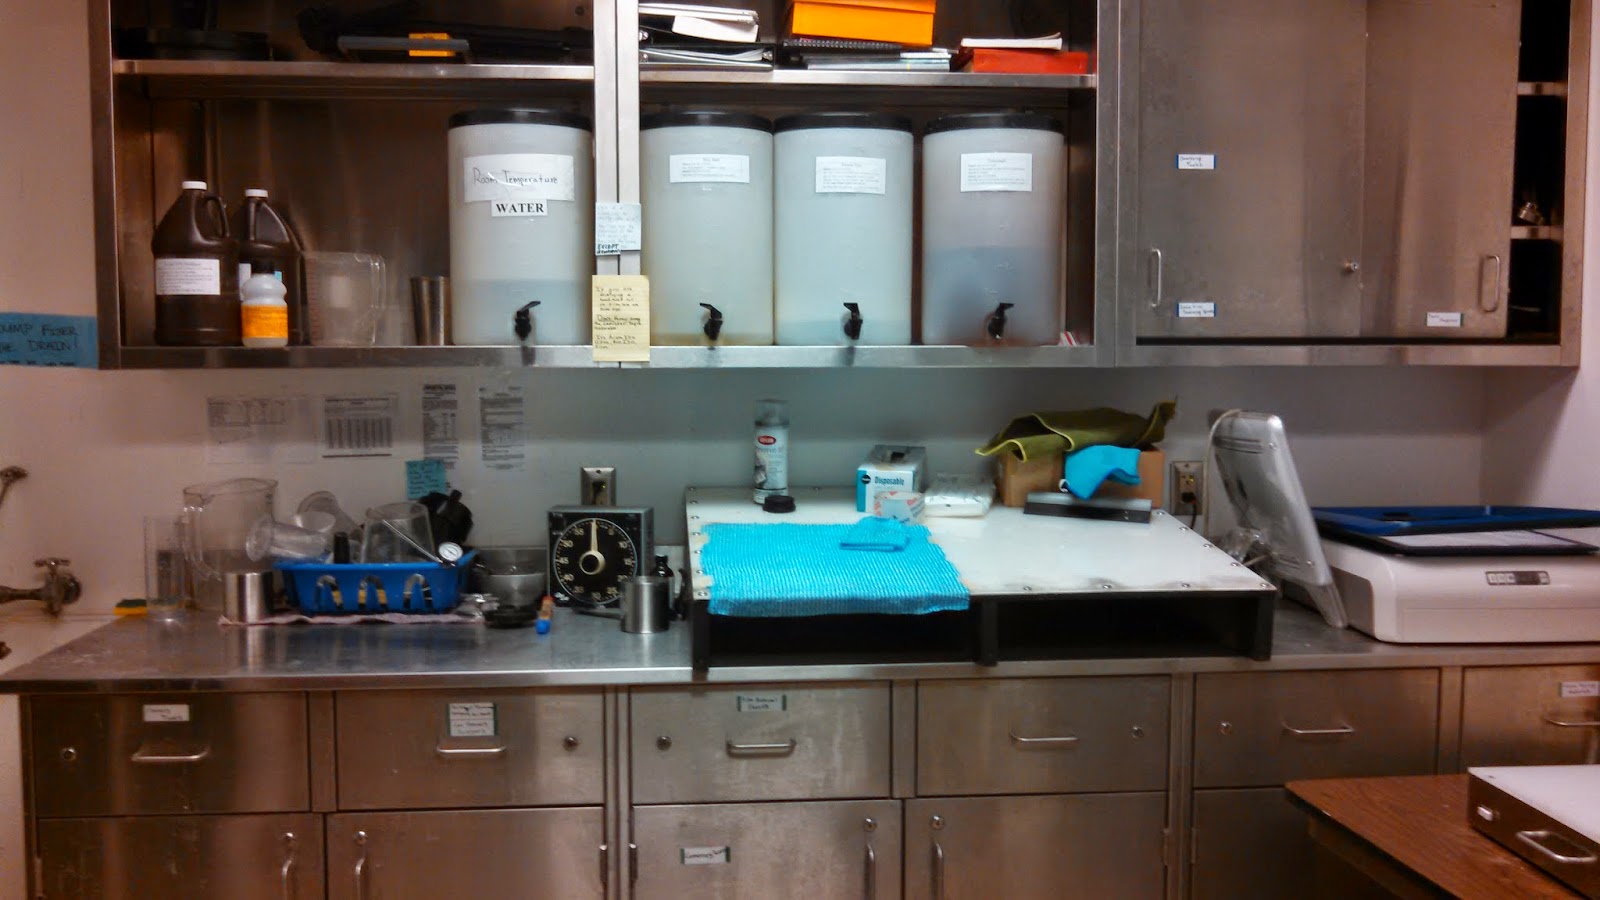
And keep all the other chemicals in large quantities. 
The very first step was to check what the room temperature was. The water on the left hand side of the picture was room temp and we measure it to be 64 degree Fahrenheit. Why is this important you ask? Chemical reactions are effected by temperature. The warmer it is the faster the reaction will occur and the less time you need to leave the chemicals on the film. Because it was pretty cool we figured out, by using a handy chart, that we needed to keep the developer on the film for 9 minutes and 15 seconds. I measured out 8 oz. of both the developer and the stop bath. I then, ever so carefully poured the developer in and capped the canister. For the next 9:15 I agitated the solution for 5 seconds ever 30 seconds rotating the can so that ever piece of the film got touched by the solution.
After the time was up I quickly poured the developer out and poured in the stop bath. The stop bath was also agitated on the same intervals but only for 5 minutes. we poured this out and filled the canister with water to rinse out the excess chemicals. The next chemical to go in was the fixer for another 5 minutes with the same agitation process. We had to pour this out into a different bucket instead of down the drain because it contains heavy metals and who wants that. This bucket would eventually be picked up by guys who take it to a place where it can be treated and safely dealt with. After the fixer we rinsed the canister again with water and followed it with the permawash. This permawash is not crucial to the development process but it does cut the final rinse process in the water current tank in half from 20 minutes to about 10. After the permawash we rinsed the film with water again and were finally able to open the light safe canister since the film could not be safely exposed to light. This was the moment of truth! The result was...............


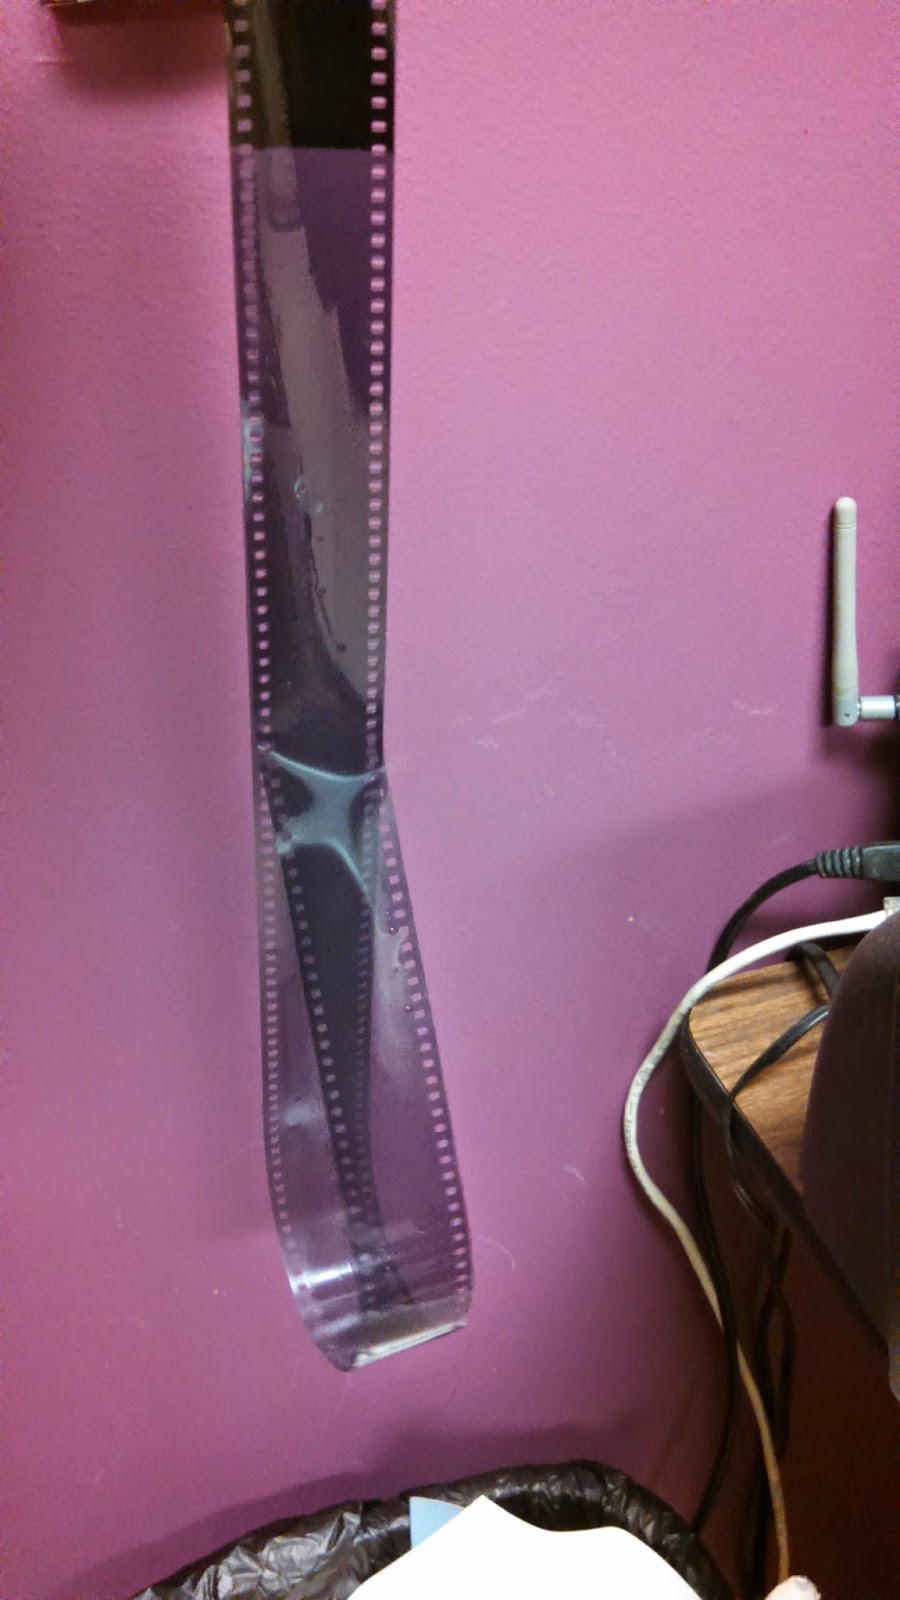
Needless to say incredibly disappointing. It appeared at the beginning as if I had done everything correctly. There's always a bit of film which doesn't have anything on it but it looked as if, as I began unrolling the reel, as if there was not a single picture! Andrew and my faces were not very happy. We concluded that the light meter in the camera was broken since the shutter was still working properly. I suppose stumbling blocks come along all the time and you can't really help that, but it was still disappointing. The one supposed bright side was that if I had taken a stellar picture I wouldn't have ruined it and it would have come out great since the process was all correct.

The game plan is to use Andrew's camera to make sure I get a really good roll of pictures so that I can start working on using the chemicals that I wanted. Until next time!

The darkroom isn't home until you have a little humor plastered on the walls. 


Monday, January 12, 2015

How the Camera Works 1/12/15

Waking up this morning to a winder that was so covered in condensation that I couldn't see out I had this sudden epiphany. How many people really understand how a film camera works? In such a digital age there is such a large portion of the population that accepts that magic that happens behind the scenes and just focuses on the results that they get. But before you get too spooked by how film cameras work, think about it like this: your grandparents could use these things. How hard can it really be?

A camera is pretty simple. It's a box with a lens on one side and film on the other side. In my camera there is an adjustable aperture as well that comes after the lens but before the shutter and the film. This allows me to control how much light enters the completely dark camera in addition to being able to adjust the shutter speed. When you take a picture you let light into the camera through the lens and through the aperture. When the shutter is open the lens takes the light rays and focuses the image onto the film. Camera film is very light sensitive due to a coating that it has. The coating reacts differently to different intensities and colors of light. When the light strikes the chemicals react creating a latent (present but invisible) image. And just like that you have taken a picture. From this point you either advance the film and repeat the process or can choose to take another picture on top of the one that you just took. 

After you use up the entire roll of film you develop the negatives and then can choose to develop your prints based on what you see in the negatives. Both of these processes are achieved by moving the negatives and the paper through various bathes of chemicals. 

I had already learned the printing process and went in today to learn the negative development process!

Picture Taking 1/11/15

After learning darkroom training the next step was to get my picture taken. After talking a while with Andrew we decided that it was best to conduct my experiment by adding the household chemicals after I start making the print so that I don't go through rolls and rolls of film. This would be much more cost effective and save a lot of time. It would allow me to find a few really good pictures and make multiple prints of it instead of trying different chemicals out on different pictures in different batches of developing. If I introduced all of these variables I would never be able to draw any conclusions about why the colors turned the colors they did.

Today I took my first stab at taking my first roll of film. The subject matter? Zoe and Zach sitting in the library working on their constellation and chess ISP's respectively. Since I only grazed over the manual there is a very large chance that everything is both too blurry and too bright but you live and you learn right? I am hoping that tomorrow I will be able to go back to the darkroom with Andrew and learn how to prepare the negatives.

The general process that I will use to prepare my negatives.

The Darkroom 1/8/15

I got to go into the darkroom! New College of Florida's darkroom is small, dark, and hidden. Many students don't realize there's a darkroom and even fewer know that it gives out free film and paper. The TA of the darkroom is a fourth year named Andrew Fiorillo who has taken my ISP as a good distraction from his thesis. He showed me around the "darkroom" and the "darkroom proper", the first of which has normal lighting where you can put your chemicals for negatives in light-safe containers, look at the negatives, dry the negatives, and dry the prints.

Andrew had already taken a roll of film and developed the negatives and was ready to print when we met so I got to learn the printing process. The negatives were in the first room that we entered in a metal cabinet that allowed the negatives to stay in a cool, dry, and most important safe space. We stood around and ate cookie dough treats for a while, while we chatted about the safety and location of all the different supplies in the main room. After I figured out that the labels generally corresponded to the content of the drawer I had to go one through one last thing before I was allowed to get added to the list of people who could check out the key from the cop shop (what students call the campus police): promise NEVER to drink the chemicals in the rooms. It was tough but I managed to make that promise.

Negative drier.

Photo drier

The cabinets got a little cramped so people started to improvise. 


After that we headed into the "darkroom proper." Going into the darkroom was like going into a secret dark red and black world. It was also freezing cold. In the center of the room was a large table that looked like a sink was attached with 3 main trays labeled "developer", "stop bath", and "fixer". The edges of the rooms were lined with metal cabinets that you might imagine show up at the morgue that were all carefully labeled. In addition, there were also six stations with large complicated looking apparatuses that had a lot of rotating pieces that I assumed were used for some kind of focusing.

We took the negatives over to the far back, left corner with the negatives cut into groups of 5 and placed into a plastic holder that kept the negatives organized. There was a foam square with a glass piece that fitted over it and what looked to be a giant microscope hovering over the station. We took out one strip of negatives and sandwiched it into two ping pong shaped paddle pieces. One side of the holder had a small square cut in one side that was the exact size of one picture on the negative strip. Then we inserted the paddle into the microscope apparatus and flipped a switch so that we could see the picture reflected onto the pane of glass. By adjusting the brightness of the light and the height at which the device was positioned we were able bring the reflection into sharp focus. To make sure that it was truly in focus we did another check using a focus strip and a small magnifier and kept adjusting the knobs until what we saw through the small magnifier was a very crisp black line and a grainy background. When we finally got all of the adjustments we took the negative back out and put it into the plastic protector. The next step was to pick a filter out of the drawer that would make give a little bit of contrast. These Ilford Multigrade filters are scaled from 00 to 5 in steps of 1/2 with the lowest number corresponding to the lightest contrast. We used #2 filter. We stuck the filter into the developing device and turned the light timer to 11. We then placed a sheet of paper on the foam, laid the plastic sleeve of the negatives on top, and flipped the switch. Finally, for eleven seconds a pinkish white light shone onto the sleeve and just like that switched back off. We removed the paper from the foam plate and moved over to the three bins of chemicals.

The first tub we put the paper into was developer and that was for 90 seconds. After that, we moved the paper to the stop bath for 30 seconds and then lastly to the fixer for 5 minutes. After the paper makes its rounds it gets put in this tank of water that keeps an even flow of water over the entire paper to remove the residual chemicals. and just like that, there's a black and white picture of all of our negatives right there in front of you!

It was almost like magic but I know there's a special science behind it and that's the next step of the process after I get some pictures taken of course!

Thursday, January 8, 2015

The Cameras 1/6/15

 A portion of the inspiration for creating this ISP was because of the cameras that my parents had and and let us look at but never use. They were always a beautiful piece of magic having grown up in the transition between film and digital and the the question: Which is better? Film or digital?
Despite the urge to be really cool and have a film camera I had, for some reason, never contemplated the science behind the magic. Whilst sitting in the second court lounge of Pei dorms in late October and discussing what we might do for ISP a second year offered up his advice: Spend your first ISP doing something fun and having nothing to do with your AOC and then get down to business. So that got me thinking, why not get those cameras up and running?

So here they are ladies and gentlemen!


This is the simpler of the two cameras that I have: the Minolta SRT 100. 
The more advance of the cameras: the Minolta X-700.

When I started thinking about using these two cameras I had to take into account the availability of the batteries that both of the cameras required. Both of the cameras were made during the period where batteries could still have mercury in them. Obviously none of those are being made now so getting the right amount of volts is a little tricky. The easier battery alternative for the X-700 was a Energizer A76 but the SRT-100 wasn't as easy. It requires 1.3V which most current batteries do not provide. I was only able to find one alternative WeinCell Replacement Battery for PX625/PX13. Inexpensive but not a solid review on their reliability. 

In addition to the main two cameras here are some of the extraneous camera materials that I have. 

Vivitar Filter for Color Correction when you are dealing with inside lighting. 

An exposure meter or which I have no clue how to use. 
A very effective and bright flash that is adaptable for both cameras that I have.

So it's off to the races with our fingers crossed in the hopes that everything will go smoothly.